November 25, 2024

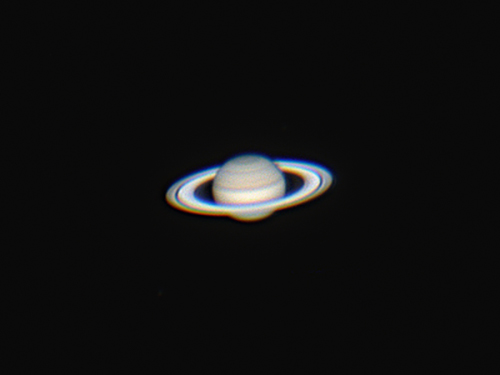
Saturn – 7/27/2021 2h0m EDT

Saturn – 7/27/2021 2h0m EDT

Telescope: Meade Mak 7 @ f/30, Orion Atlas EQ-G

Camera: ZWO ASI294MC Pro, 0C, 2” GSO 2x ED Barlow

Filter: Highpoint Scientific IR cut filter

Seeing: fair, 3/5

Exposure 1: 5min x 250ms, gain 300, saved as SER

Exposure 2: 5min x 100ms, gain 400, saved as SER

White Balance: Nebulosity Automatic

Software: SharpCap Pro, AutoStakkert, Registax, Nebulosity, Photoshop

This is an average of two quick sequences that I grabbed of Saturn before it reached the meridian. In part, I wanted to compare using longer exposures using lower gain versus sorter exposures and higher gain. I just so happens that these two sets were very similar, so I averaged them into a single image. I am very happy with the results and I’m looking forward to trying this again using a camera with slightly smaller pixels (an ASI462MC with 2.9um pixels). If you look really closely you can glimpse Rhea to the lower left of Saturn and Tethys to the upper right.

Jupiter – 7/28/2021 3h10m EDT

Jupiter – 7/28/2021 3h10m EDT

Telescope: Meade Mak 7 @ f/38, Orion Atlas EQ-G

Camera: ZWO ASI224MC, 2.5x Powermate

Filter: Meade IR cut filter

Seeing: fair, 3/5

Exposure 6x(3min x 50ms), gain 300, saved as SER

White Balance: Nebulosity Automatic

Software: SharpCap Pro, AutoStakkert, Registax, WinJUPOS, Nebulosity, Photoshop

I finally got an image of Jupiter that I am happy with, and once again it almost didn’t happen. I left my gear set up planning on switching over to deepsky imaging, but the transparency wasn’t cooperating so I decided to take one more set of source images of Jupiter. For this set I switched amplifiers from a GSO 2” 2x ED Barlow to a 2.5x Powermate and I swapped out an ASI294MC Pro for an ASI224MC. The uncooled 224 is smaller and lighter than the cooled 294 and has slightly smaller pixels. I was interested in the smaller pixels and not hanging the weight of a cooled camera on the end of the Powermate. The 224 had couple of hot pixels, but they processed out fairly well. The smaller pixels resulted in a high degree of over-sampling that I took advantage of by down-sampling the images by binning them 2×2. This did a great job taming the noise and still giving an appropriate image scale that was just a tad over-sampled. The next step will be to try an ASI462MC to take this approach of taking over-sampled source images and binning them 2×2 in post-processing one step farther and to give this a try on my C11 or C9.25 and down-select to which scope I’ll be using for the rest of this imaging season with Jupiter and Saturn.

Fun stuff!

Jupiter – 7/24/2021 4h24m EDT

Jupiter – 7/24/2021 4h24m EDT

Telescope: Meade Mak 7 @ f/30, Orion Atlas EQ-G

Camera: ZWO ASI294MC Pro, 0C, GSO 2” 2x ED Barlow

Filter: Highpoint Scientific IR cut filter

Seeing: poor, 2/5, smoke, haze

Exposure 5x(3min x 25ms), gain 400, saved as SER

White Balance: Nebulosity Automatic

Software: SharpCap Pro, AutoStakkert, Registax, WinJUPOS, Nebulosity, Photoshop

I’ve decided to use the period between the waxing and waning gibbous moon to work on my planetary imaging starting with an evaluation of different equipment combinations. I started with my C11, which it where I expect to end up, but I also want to spend some time with my C9.25 and Mak 7. Of these I am particularly interested in the Mak 7 as it has the best optics that I have seen in a consumer telescope and I’m interested in how it stacks up against my larger options.

This is the first test image taken with the Mak 7 and it almost didn’t happen. I usually limit my imaging to the eastern sky as my house blocks most of the sky on the west side of the meridian. To catch Jupiter before it reaches the meridian I need to catch it before about 3:45. On this morning I stepped outside around 3:00 and found a solid cloud cover almost all the way to the southern horizon, so I parked my scope, pulled off the expensive bits, and covered everything up. I stepped outside again a little after 4:00 and found that the clouds had moved northward enough that Jupiter was in clear air, though it was past the meridian and I was close to losing it behind my house. I quickly pulled the covers off, put everything back on, powered everything up, set the focus, and grabbed five 3 minute sequences. The seeing wasn’t very good and I was surprised that it turned out as well as it did. I’ll probably leave my gear in this configuration for the remainder of this imaging opportunity. Next month I may stick with the Mak 7 and switch to a more conventional planetary camera like the ASI462MC and a 2.5x Powermate.

So much to try, so few clear nights!

Jupiter – 7/20/2021 1h35m & 3h24m EDT

Jupiter – 7/20/2021 1h35m & 3h24m EDT

Telescope: Celestron C11 @ f/20, Orion Atlas EQ-G

Camera: ZWO ASI294MC Pro, 0C, GSO 2” 2x ED Barlow

Filter: Highpoint Scientific IR cut filter

Seeing: fair, 3/5, Smoke, haze

Exposure 1h35m: 3min x 75ms, gain 400, saved as SER

Exposure 3h24m EDT: 5x(3min x 50ms), gain 400, saved as SER

White Balance: Nebulosity Automatic

Software: SharpCap Pro, AutoStakkert, Registax, WinJUPOS, Nebulosity, Photoshop

These two image sets were taken about 2 hours apart on the morning of July 20th. The first image was a single 3 minute capture taken while Jupiter was fairly low in the east as insurance in case the sky conditions worsened. As I was setting up to start the sequence I had to wait a few minutes as Io was emerging from behind the planet and I wanted to be sure it was clear of Jupiter’s western limb. It was really neat to watch how fast Io moves! The second image was taken as Jupiter was nearing the meridian and was about as high as it was going to get above the horizon, about 37 degrees. This was a set of five 3 minute images sets de-rotated and combined in WinJUPOS. This technique reduces noise in a manner similar to dithering a deepsky image and it is informative to compare to compare this image with the single stack taken at 1h35m. This also illustrates how fast Jupiter rotates. For example, the ovals seen at the lower right in the first image have rotated completely out of view over the eastern limb in the second view. Also, Europa and Io have moved out of the field of view to the left. Neat stuff!

Jupiter – 7/19/2021 2h10m & 3h36m EDT

Jupiter – 7/19/2021 2h10m & 3h36m EDT

Telescope: Celestron C11 @ f/20, Orion Atlas EQ-G

Camera: ZWO ASI294MC Pro, 0C, OPT 2” 2x Barlow

Filter: Highpoint Scientific IR cut filter

Seeing: poorr, 3/5, smoke, haze

Exposure: 3min x 20ms, gain 400, saved as SER

White Balance: Nebulosity Automatic

Software: SharpCap Pro, AutoStakkert, Registax, Nebulosity, Photoshop

These two image sets were taken about 90 minutes apart on the morning of July 19th through thick smoke from wild fires burning in Canada and the Pacific northwest. In the first image taken at 2:10 the Great Red Spot is rotating out of view to the lower right, Io is the bright spot against the gray limb darkening near the equator at left, and Io’s shadow is near the center. In the second image the Io’s shadow is about the leave the face of Jupiter and Io itself can be seen as a gray spot against the white equatorial zone.

Jupiter – 7/18/2021 2h17m & 3h17m EDT

Jupiter – 7/18/2021 2h17m & 3h17m EDT

Jupiter – 7/18/2021 2h17m & 3h17m EDT

Telescope: Celestron C11 @ f/20, Orion Atlas EQ-G

Camera: ZWO ASI294MC Pro, 0C, OPT 2” 2x Barlow

Filter: Highpoint Scientific IR cut filter

Seeing: poorr, 3/5, clouds, haze

Exposure: 3x(1024x100ms), gain 300, binned 3×3, saved as SER

White Balance: Nebulosity Automatic

Software: SharpCap Pro, AutoStakkert, Registax, Nebulosity, Photoshop

These two images were taken as part of an initial test of using this equipment set for lunar and planetary imaging. I had expected the conditions to be rough and the primary objectives were to get the equipment assembled, aligned and focused and the take a look at the field of view and field quality. Getting useful images would have been a bonus. I got up about 2am to fine tune the focus and image Saturn right before it reached the meridian. Unfortunately, the sky was covered with a veil of thick haze and clouds. I could see Saturn through the clouds using long exposures, but imaging was out of the question. Jupiter was brighter, but not much better. I found that if I set the exposure to 100ms (about 10x longer than normal) I could catch glimpses of the planet through thinner spots in the clouds. Just for yucks I grabbed 3 sets of 1024x100ms images each with the hopes of snagging at least a few usable images. I stepped outside about an hour later hoping to catch Jupiter before it reach the meridian, and the conditions were even worse, but again I grabbed 3 sets of 1024x100ms images just to see what I could get. I also binned the source images 3×3 to work within the rough seeing conditions. Surprisingly, the results weren’t that bad! At 2:17 I caught Europa approaching Jupiter with its shadow in transit, and at 3:17 the Great Red Spot was just rotating into view. Europa was now in transit and lost against the planet, though it’s shadow was still clearly visible. The planet itself showed a nice amount of detail and beautiful colors. It will be fun to see how this system performs when it is actually clear!

M15 – Globular Cluster in Pegasus

M15 – Globular Cluster in Pegasus

Telescope: Astro-Tech 8” f/8 Ritchey-Chretien, Orion Atlas EQ-G

Camera: Canon EOS Ra, Baader Mk III MPCC

Filter: Orion Imaging Skyglow Filter

Guide scope: Astro-Tech 60mm, Starlight Xpress Super Star, PHD2

Exposure: 43x60sec, ISO 800, saved as RAW

Darks: Internal (Long Exposure Noise Reduction On)

Flats: 32×1/25sec, Tee shirt flats taken at dusk

Average Light Pollution: Red zone, Bortle 8, fair transparency, haze

Lensed Sky Quality Meter: 18.4

Stacking: Simple average to accommodate the two different exposure times

White Balance: Nebulosity Automatic

Software: Backyard EOS, Deep Sky Stacker, Nebulosity, Photoshop

M15, a bright, condensed globular cluster in a relatively lonely stretch of sky in Pegasus. It is one of the oldest known globular clusters with an estimated age of 13.2 billion years and the first globular cluster found to have a planetary nebula (Pease 1), one of only four planetary nebula associated with a globular cluster. M15 is also one of the most condensed globular cluster and at some point in the distant past it experienced a core collapse that may have heralded the formation of a black hole in its nucleus. This is supported by the fact the M15 is an x-ray source.

This is the last of three first-light images taken with my new Canon EOS Ra camera. I had originally planned to end the evening with an emission nebula, but the hazy sky conditions didn’t look suitable, so I opted for a bright globular instead.

M15 is currently well placed rising the east in the early evening and is high in the south at dawn.

M27 – Planetary Nebula in Vulpecula

M27 – Planetary Nebula in Vulpecula

Telescope: Astro-Tech 8” f/8 Ritchey-Chretien, Orion Atlas EQ-G

Camera: Canon EOS Ra, Baader Mk III MPCC

Filter: Orion Imaging Skyglow Filter

Guide scope: Astro-Tech 60mm, Starlight Xpress Super Star, PHD2

Exposure (6-26-2021): 27x120sec, ISO 800, saved as RAW

Exposure (7-2-2021): 28x180sec, ISO 800, saved as RAW

Darks: Internal (Long Exposure Noise Reduction On)

Flats: 32×1/25sec, Tee shirt flats taken at dusk

Average Light Pollution: Red zone, Bortle 8, fair transparency, haze

Lensed Sky Quality Meter: 18.1 (6-26) & 18.5 (7-2)

Stacking: Simple average to accommodate the two different exposure times

White Balance: Nebulosity Automatic

Software: Backyard EOS, Deep Sky Stacker, Nebulosity, Photoshop

M27, the Dumbbell nebula, is an expanding shell of gas that was ejected from a sun-like star as it exhausted its hydrogen fuel. Swollen into a red giant, the star shed its outer shell while its core collapsed into a white dwarf. Fierce UV radiation from the collapsed core sets the surrounds gas aglow with the blue/green light of doubly ionized oxygen. The diameter of the nebula is about 1 light-year with an estimated age of 9,800 years. Located between Sagitta and Cygnus, M27 is fairly easy to find with a small telescope. Visually, it shows two lobes connected by a neck of nebulosity, giving the nebula its characteristic dumbbell shape.

This is the second of three first-light images taken with my new Canon EOS Ra camera. The source images were taken over two evenings about a week apart: 27x120sec on 6-26 and 28x180sec on 7-2. The exposure times reflect the poor transparency on the evening of 6-26. I wasn’t sure how well the two different exposure times would combine, so I used a simple average algorithm rather than using the usual sigma clip.

M27 is currently well placed rising the northeast in the early evening and is high in the south after midnight.

M13 – Globular Cluster in Hercules

M13 – Globular Cluster in Hercules

Telescope: Astro-Tech 8” f/8 Ritchey-Chretien, Orion Atlas EQ-G

Camera: Canon EOS Ra, Baader Mk III MPCC

Filter: Orion Imaging Skyglow Filter

Guide scope: Astro-Tech 60mm, Starlight Xpress Super Star, PHD2

Exposure: (18 + 29)x60sec, ISO 800, saved as RAW

Darks: Internal (Long Exposure Noise Reduction On)

Flats: 32×1/25sec, Tee shirt flats taken at dusk

Average Light Pollution: Red zone, Bortle 8, poor transparency, haze

Lensed Sky Quality Meter: 18.4

Stacking: Mean with a 1-sigma clip.

White Balance: Nebulosity Automatic

Software: Backyard EOS, Deep Sky Stacker, Nebulosity, Photoshop

Globular clusters are relics of the ancient universe and M13 is no exception with an estimated age of 12 billion years. Their great age is an indication of their unusual stability. One consequence of this stability is that any heavy elements that their stars have made remains buried in their cores and the cluster itself has little, if any, interstellar dust. M13 is one of the few globular clusters with a dust-like feature that can be seen as a dark lane extending to the lower left of the core. It is possible that this dust lane is not really associated with M13, but instead is an independent object that just happens to be in front of the cluster.

This is the first-light image taken with my shiny new Canon EOS Ra. The weather really hasn’t cooperated yet, so I combined two sets of source images taken on the evenings of June 26th and July 2nd. One thing that I noted is that even though the sensor was very warm (33-47C) all of the source images were very clean with no hot or cold pixels. Being a mirrorless camera the shutter was smooth and quite. This was one feature that I was particularly interested in after having a few problems with the relatively heavy and complex mirror system in my Nikon D610a. I do luvs the Nikon, but I was curious enough about the performance of a modern mirrorless camera to give the EOS Ra a try. I was also fascinated by the idea of using a full-frame DSLR specifically made for astrophotography and I have enjoyed my previous Canon cameras. So far I am really liking the new camera! It was very easy to integrate into my imaging gear and has been very easy to use. Wonderful!

M13 is currently well placed high in the northeast as the sky darkens.

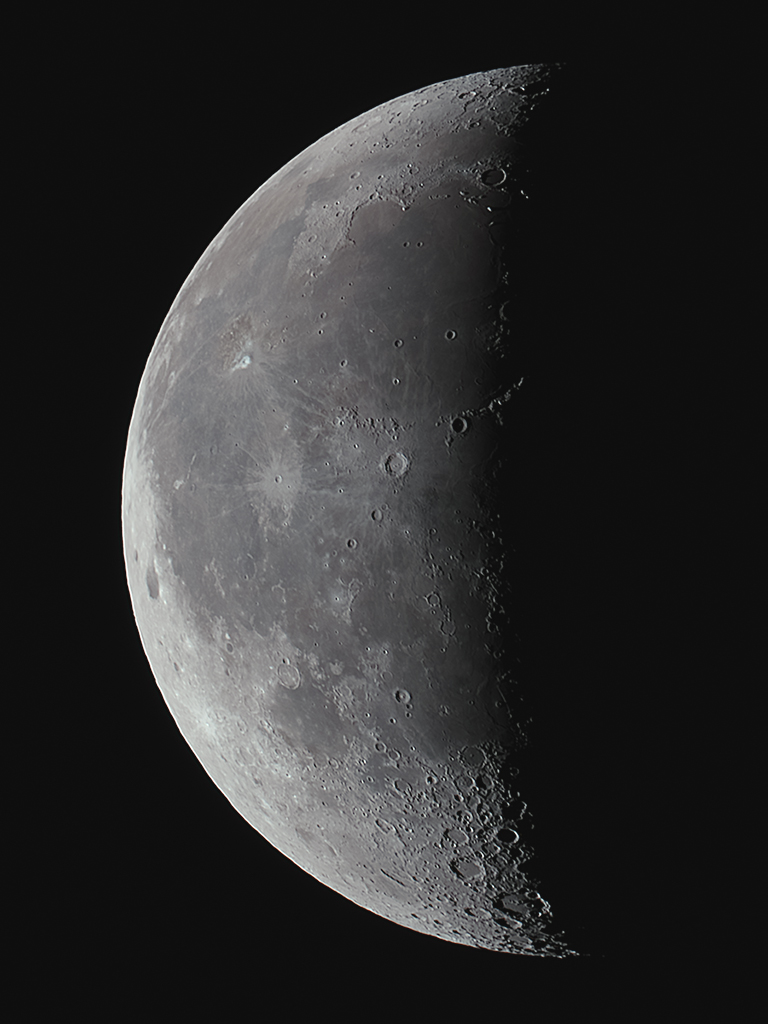
Waning Crescent Moon – 7/3/2021 4:20am EDT

Waning Crescent Moon – 7/3/2021 4:20am EDT

Telescope: Astro-Tech RC8 @ f/8, Orion Atlas EQ-G

Camera: Canon EOS Ra, Baader Mk III MPCC

Filter: Highpoint Scientific IR Filter

Exposure: 64×1/250 sec, ISO 3200, saved as RAW

Seeing: Poor, 2/5

White Balance: Nebulosity Automatic

Software: Backyard EOS, Nebulosity, Registax, Photoshop

I stepped outside this morning to begin the process of covering my gear after a long night of imaging and found the moon peeking through a gap in the bush next to my scope, so I grabbed a quick set of images to close-out the first full night of testing my new camera. Unfortunately, the sky is veiled with smoke from wild fires burning in British Columbia, but it was still a very pretty sight.